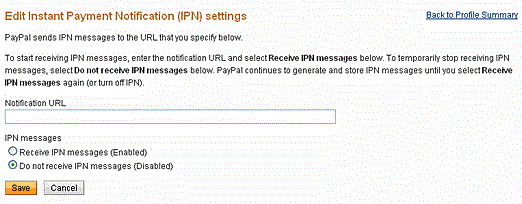
The following procedure describes how to specify and activate the URL for your IPN listener in your PayPal profile.
IPN URL: Your IPN URL is usually your website URL. So if your site is http://example.com, then that would also be your IPN URL. This could change however if you have WordPress installed in different directory.
- Log in to your PayPal account at www.paypal.com.
- Click the profile icon (
 ) on the top right side of the page. From the Business Profile menu, select Profile and Settings, then select My selling tools.
Note: If you do not see the profile icon on the top right, navigate to My Account > Profile > My Selling Tools. - Click the Update link in the Instant payment notifications row, in the Getting paid and managing my risk section.
- Click Choose IPN Settings to specify your listener’s URL and activate the listener. The following page opens:

- Specify the URL for your listener in the Notification URL field.
- Click Receive IPN messages (Enabled) to enable your listener.
- Click Save. The following page opens:


