Note: This tutorial will be the same for all versions of Microsoft Windows, Apple Mac and Linux operating systems.
Note: If you will be installing this plugin on a WordPress multisite, please follow this one additional step.
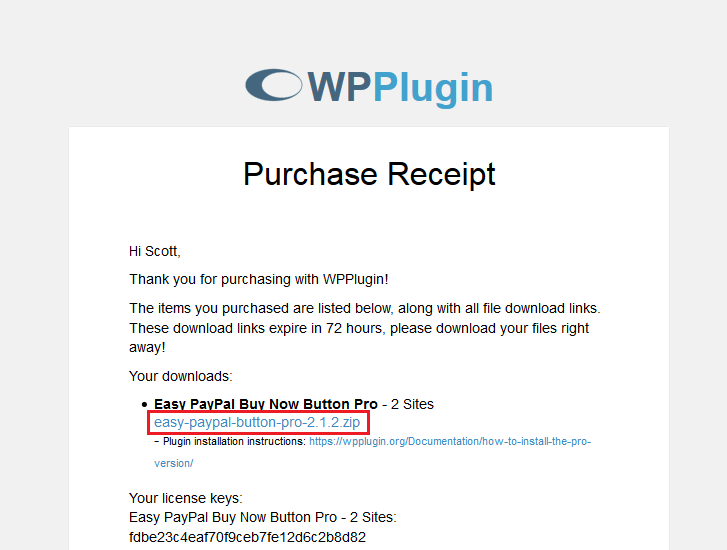
Step 1: Download the pro version plugin file from the email you received.
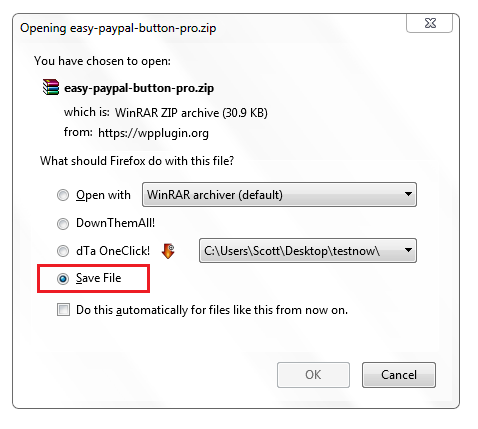
Step 2: Save the file anywhere on your computer.
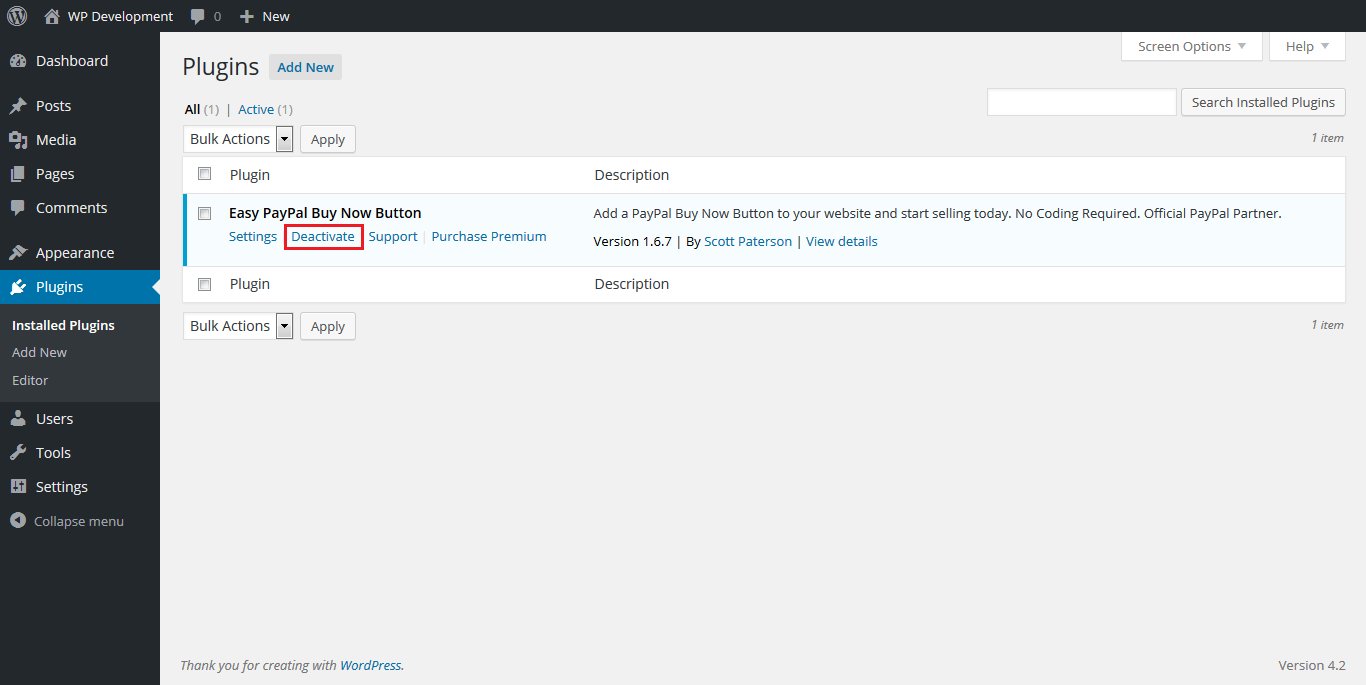
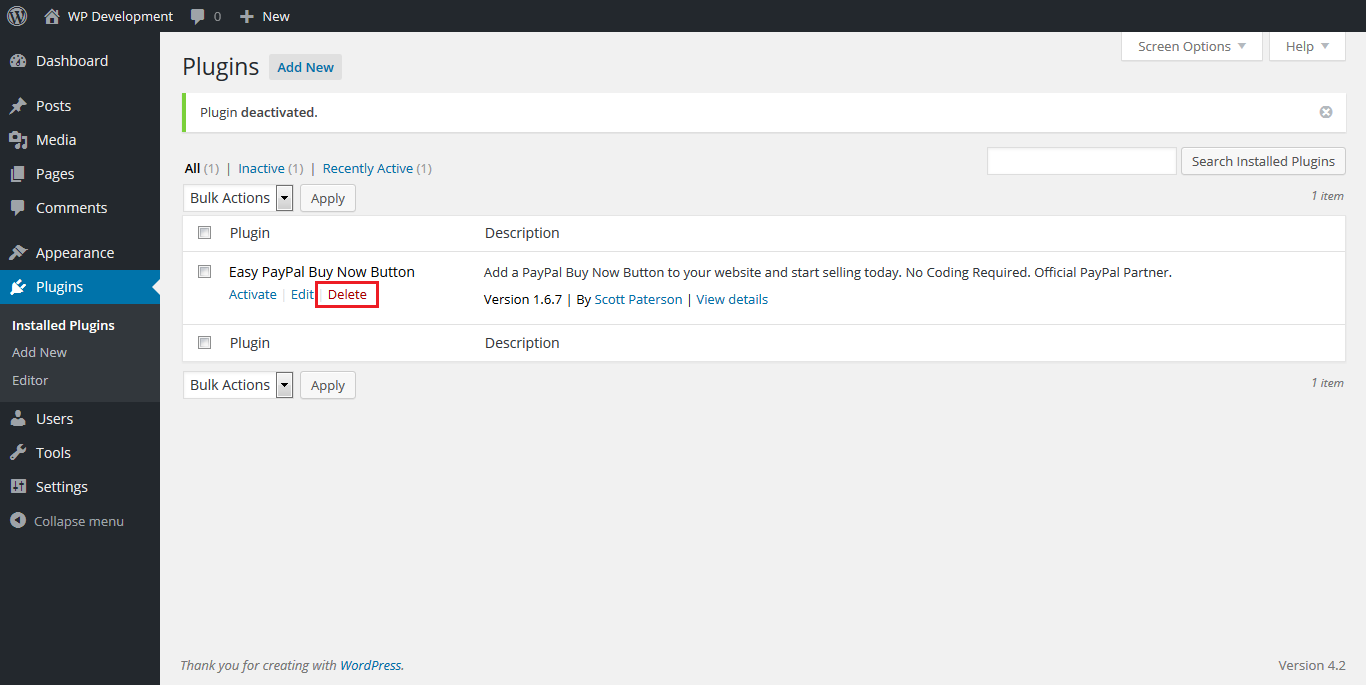
Step 3: Deactivate the free version of the plugin.
Step 4: Delete the free version of the plugin. Don’t worry, your settings will not be lost.
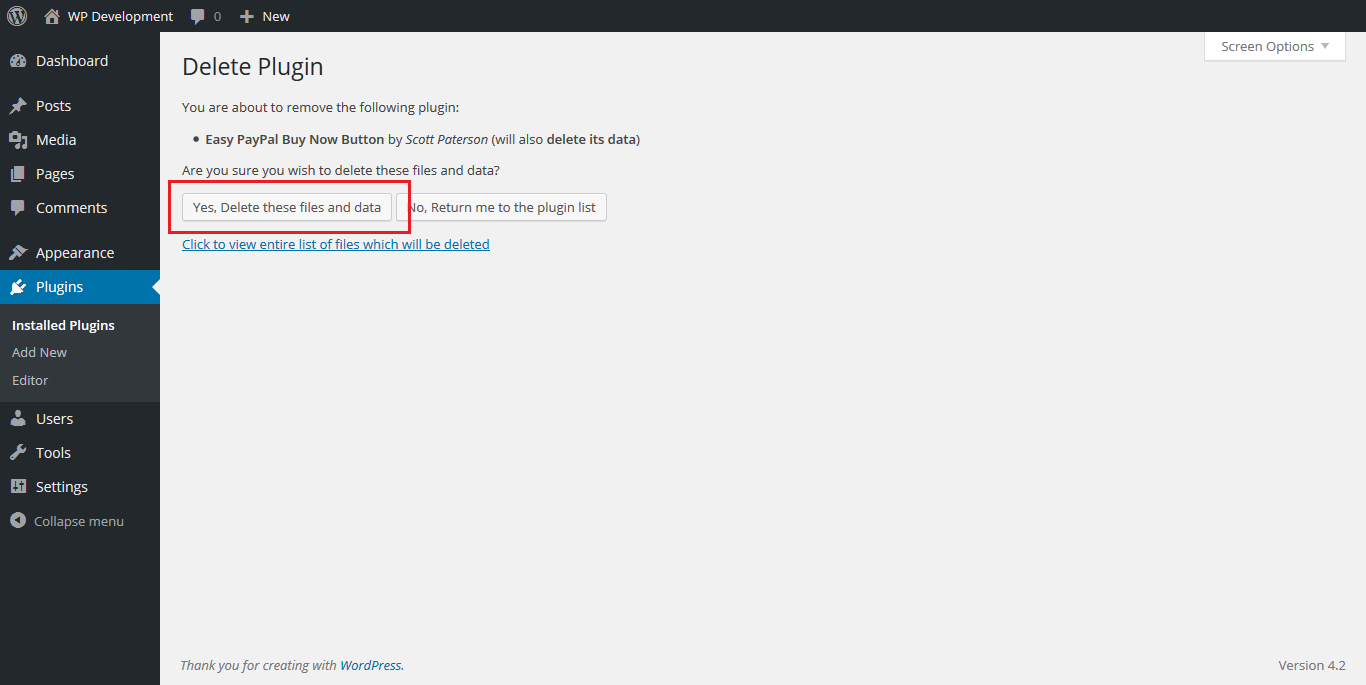
Step 5: Confirm deleting the plugin.
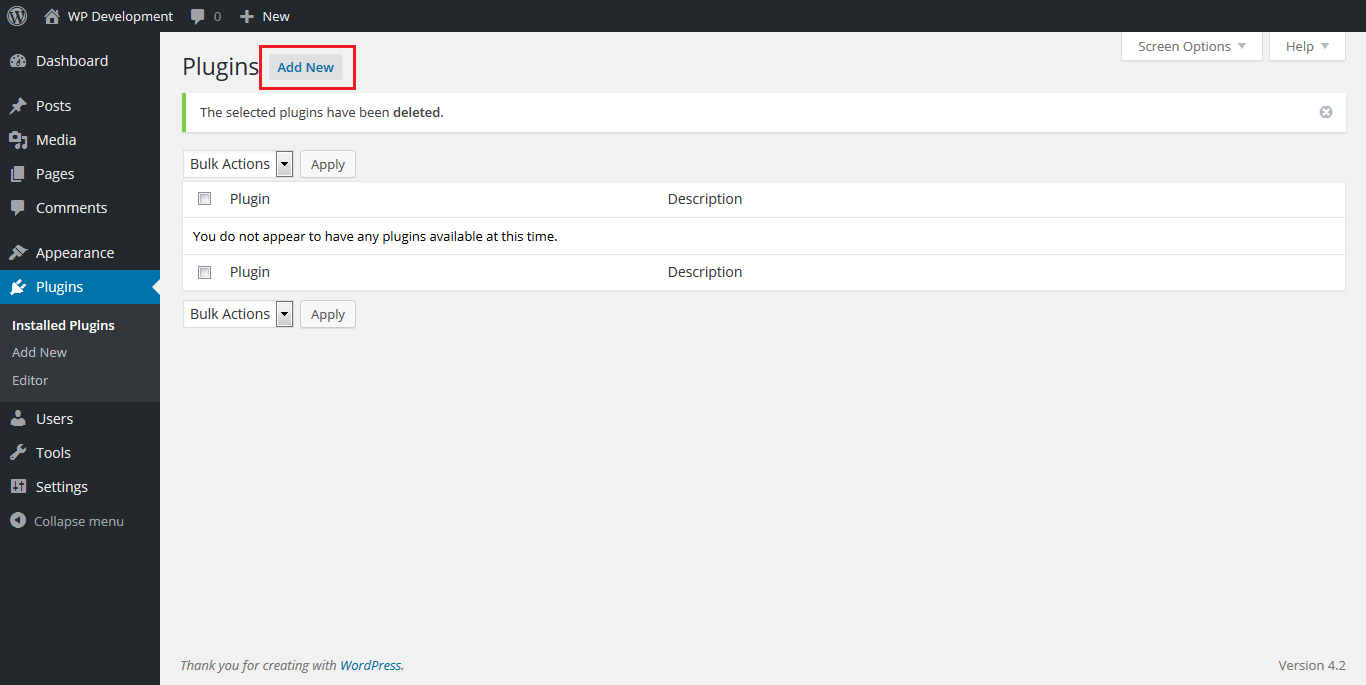
Step 6: Click the add new plugin button.
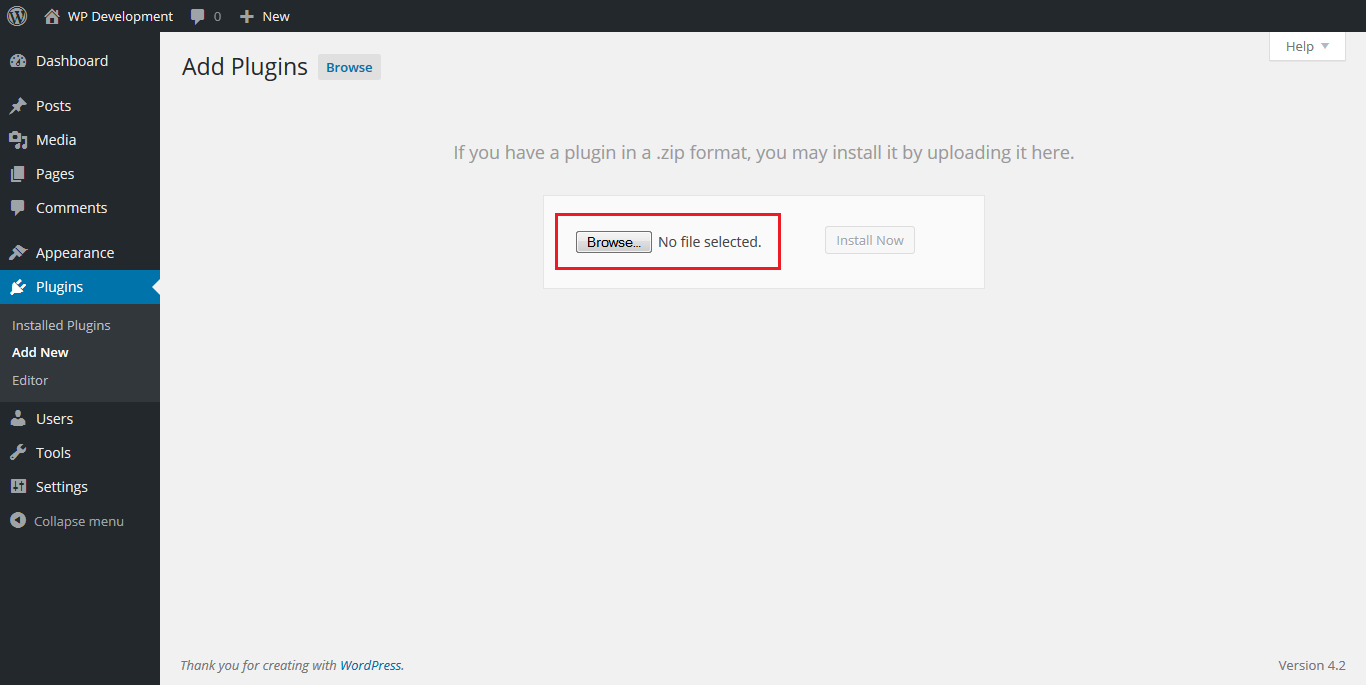
Step 7: Click the upload plugin button.

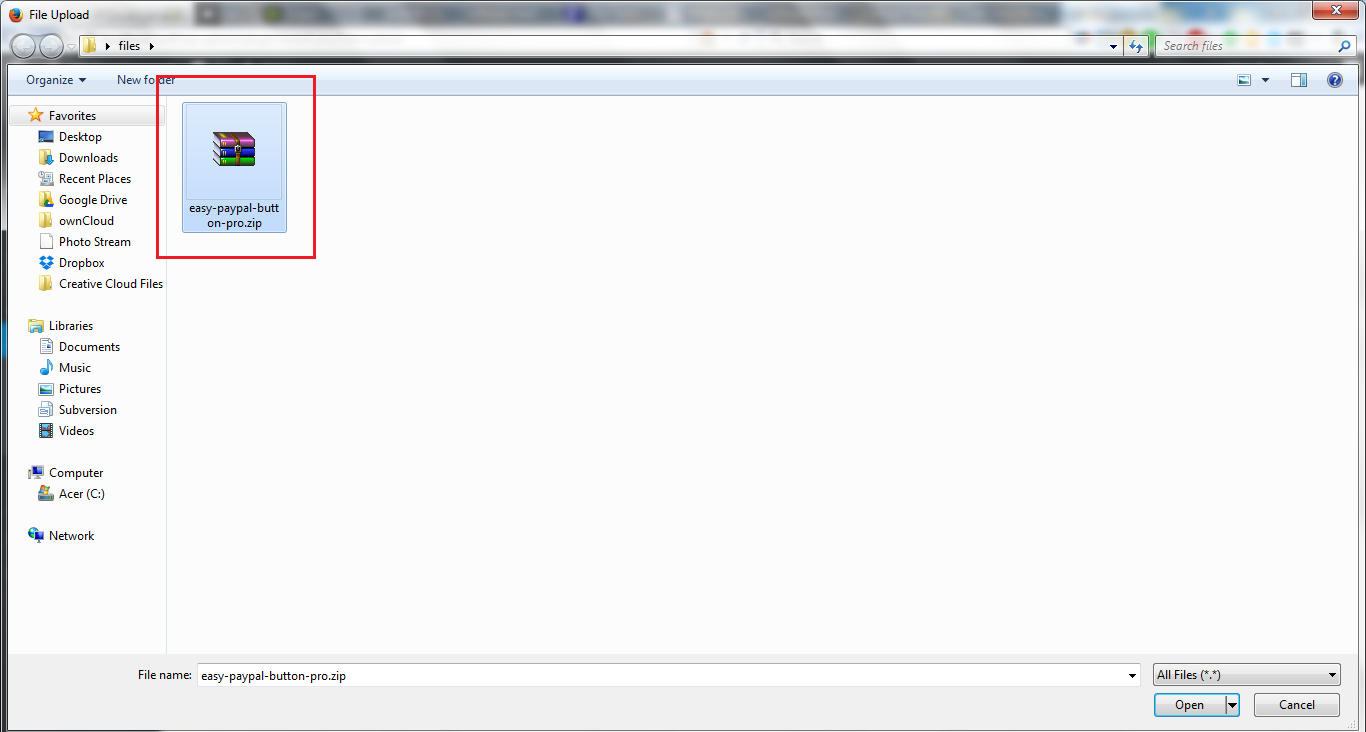
Step 8: Click the browse button. Located the zip file from step 1. Do not unzip the file.
Note: If you are using a Mac, Safari may have auto unziped the file for you and you will only see a folder. Please click here to learn how to re-zip the file so that it can be upload to WordPress.
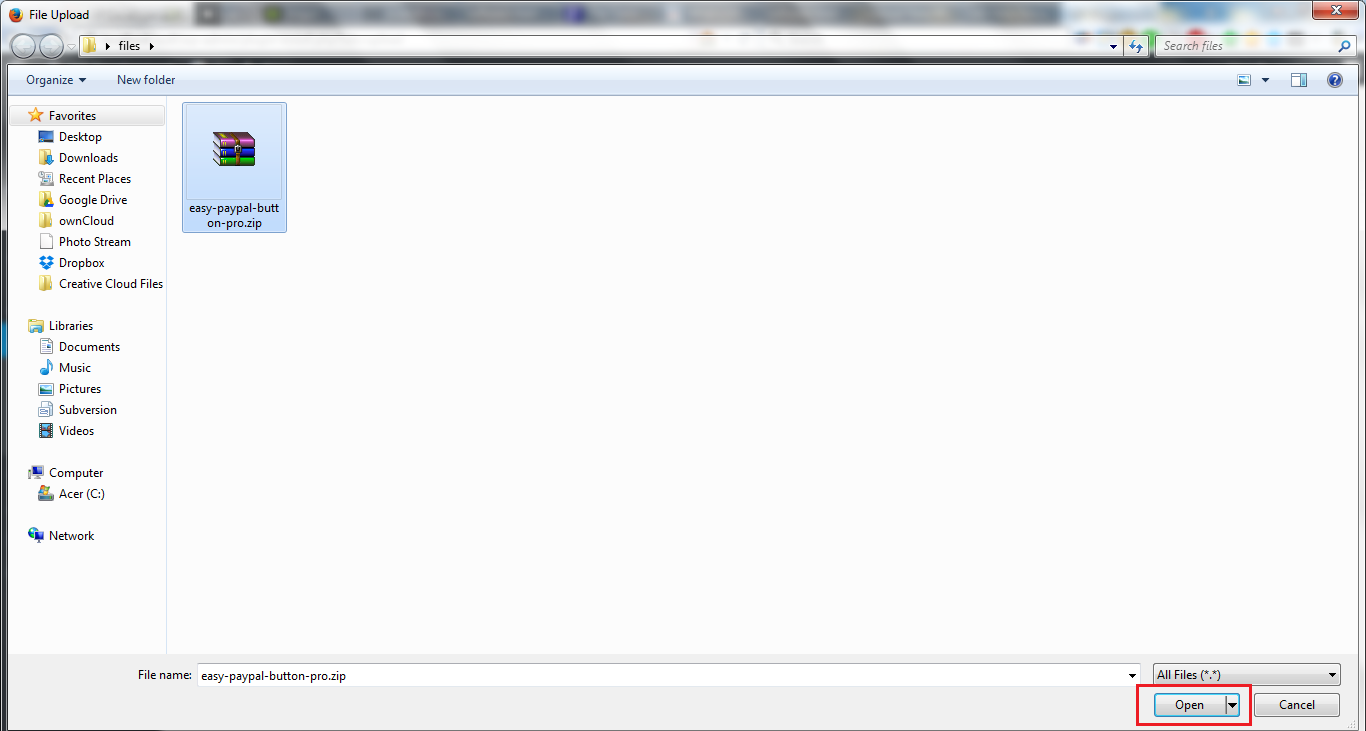
Step 9: Once you have selected the zip file, click “Open” to select it.
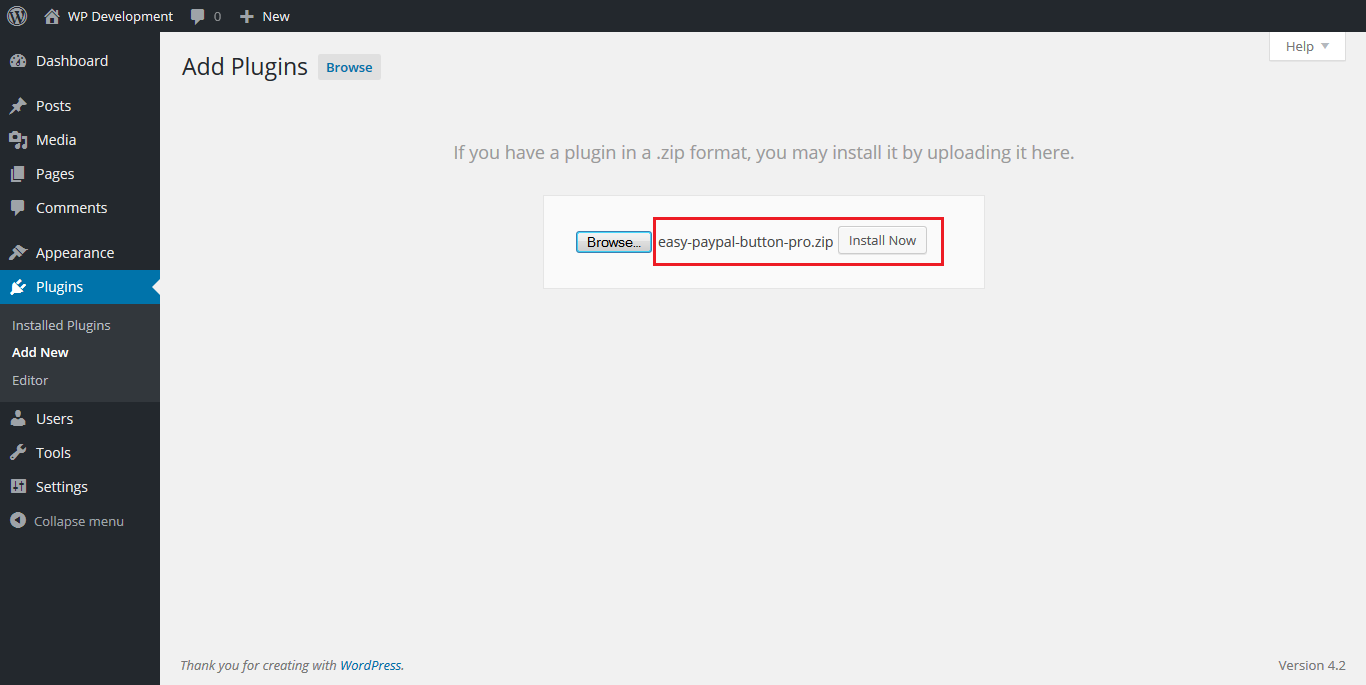
Step 10: Click the install button.
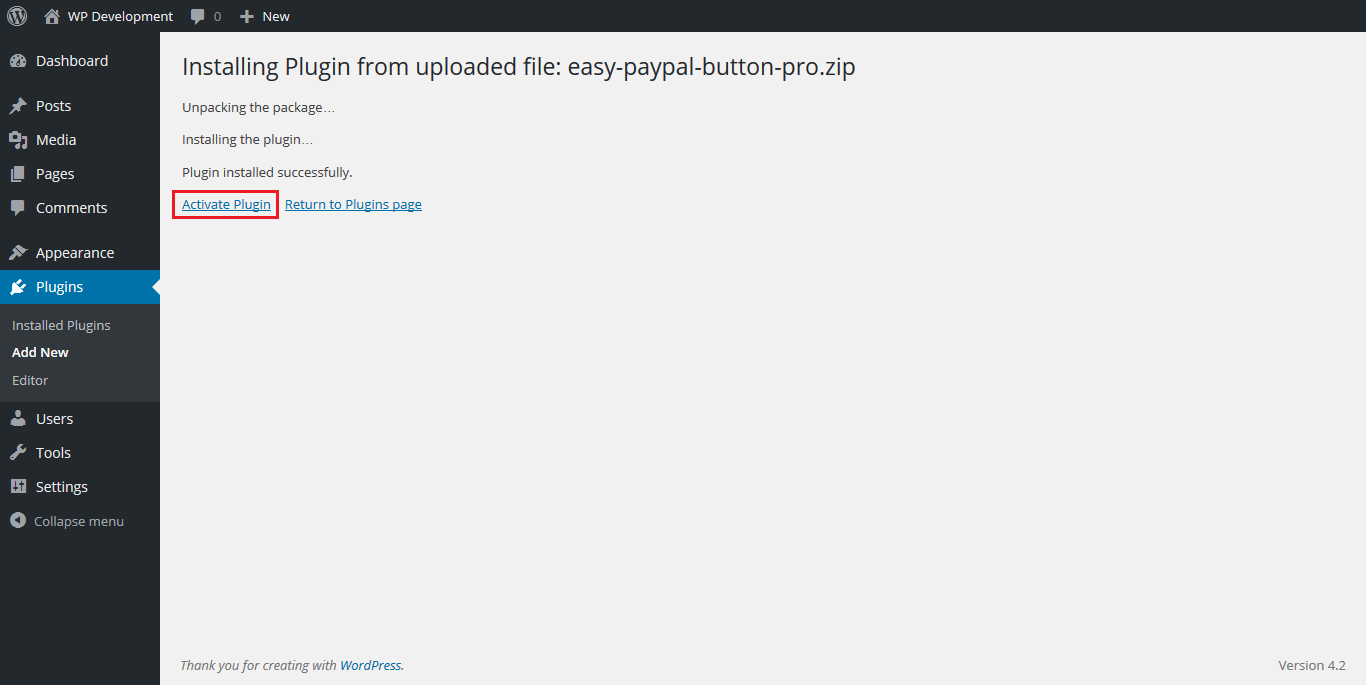
Step 11: Click the activate button.
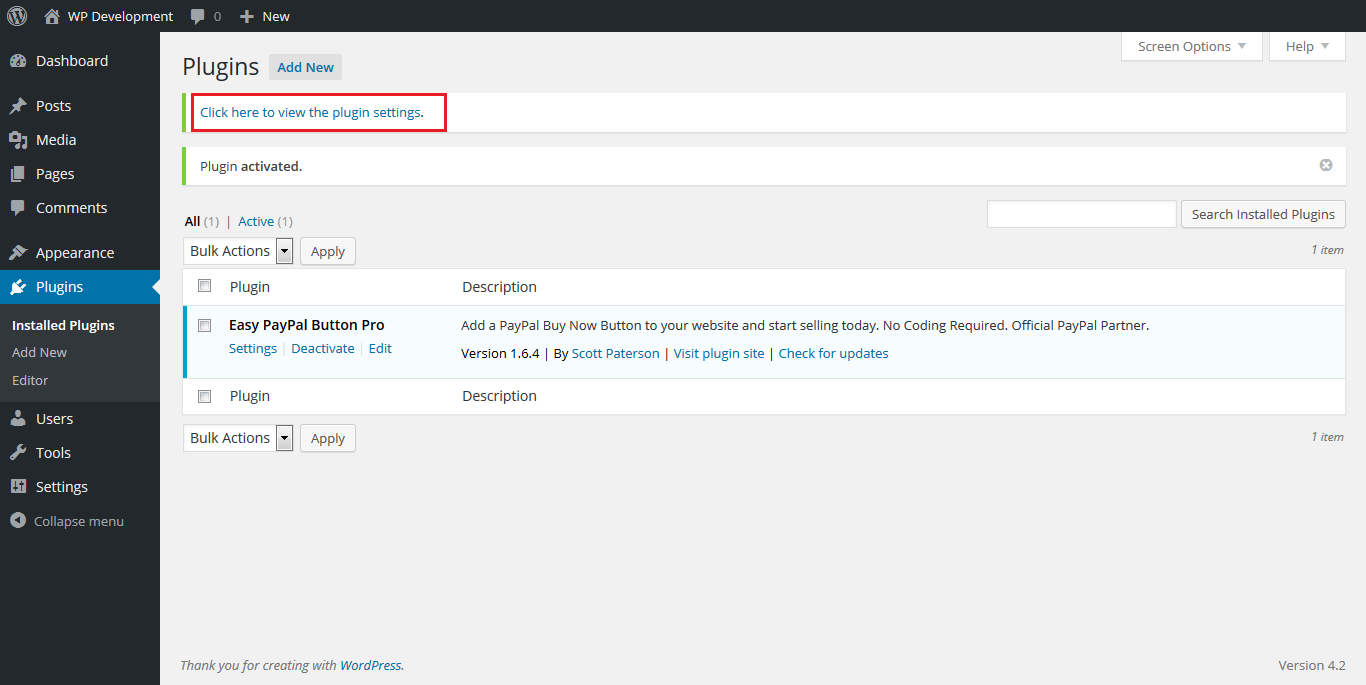
Step 12: View the plugin settings.
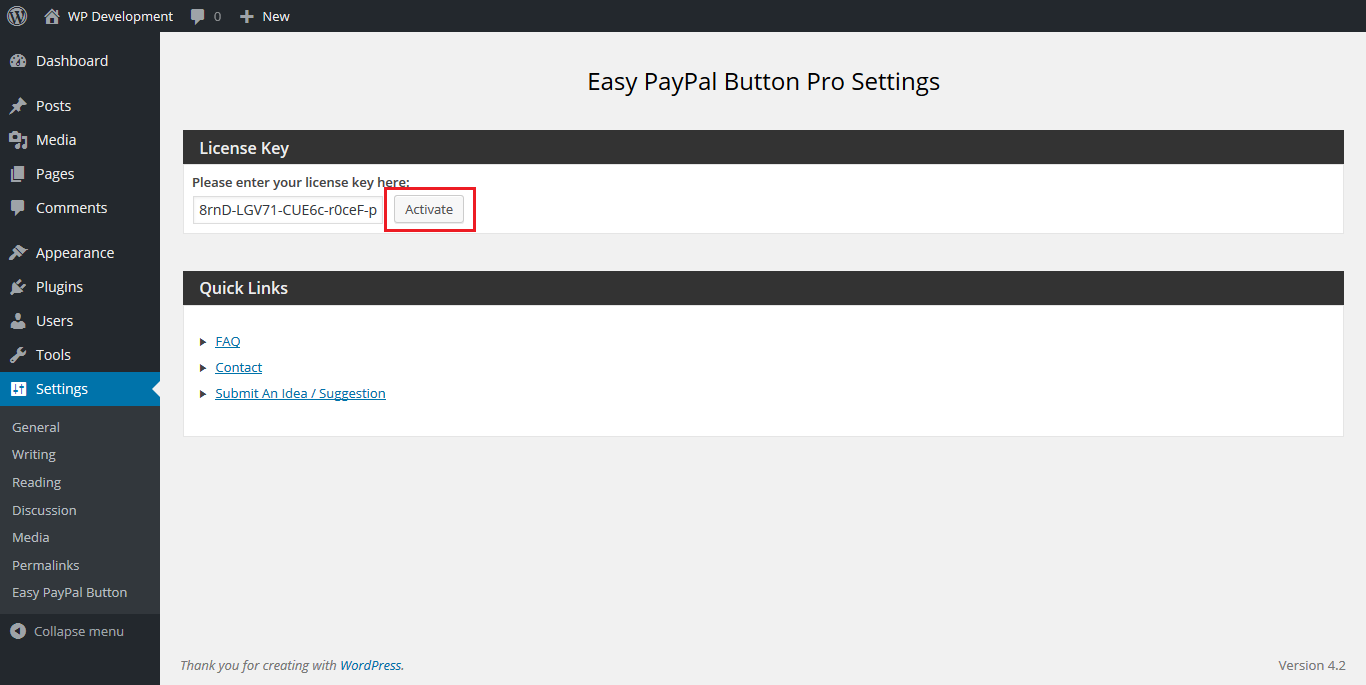
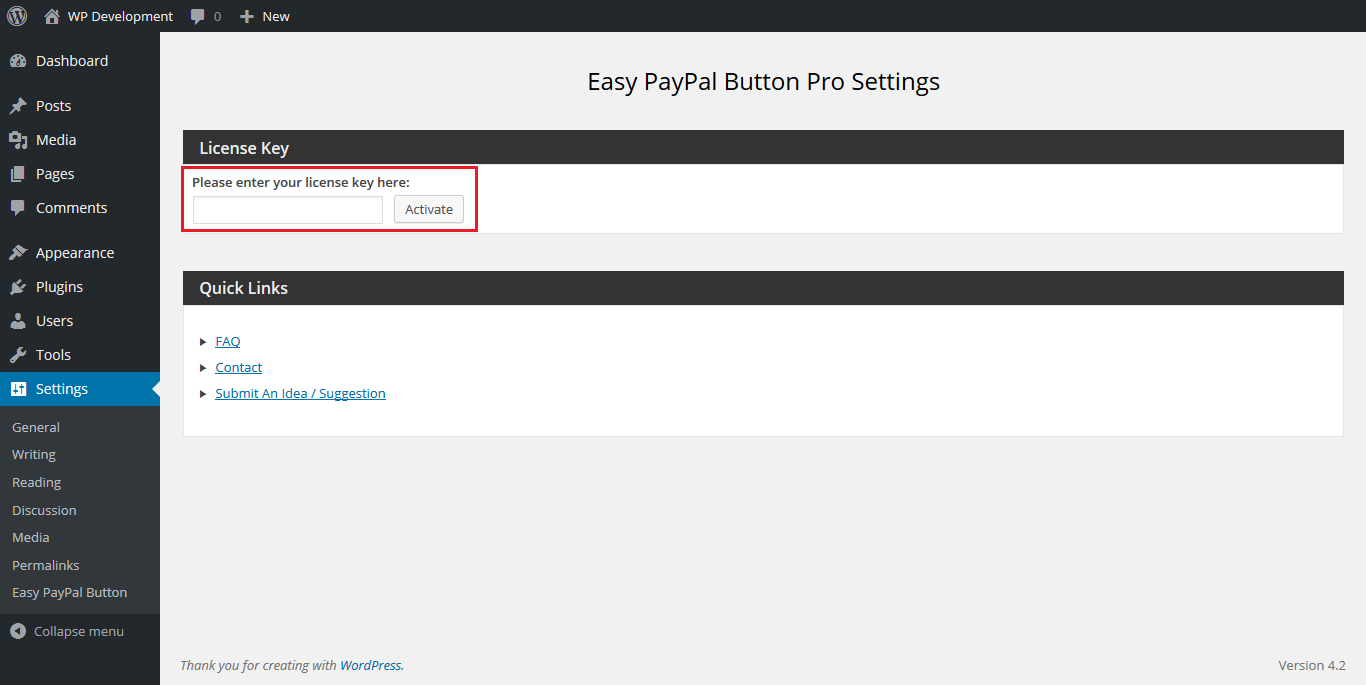
Step 13: On the plugin settings page you will see a text box where you need to enter the license key.
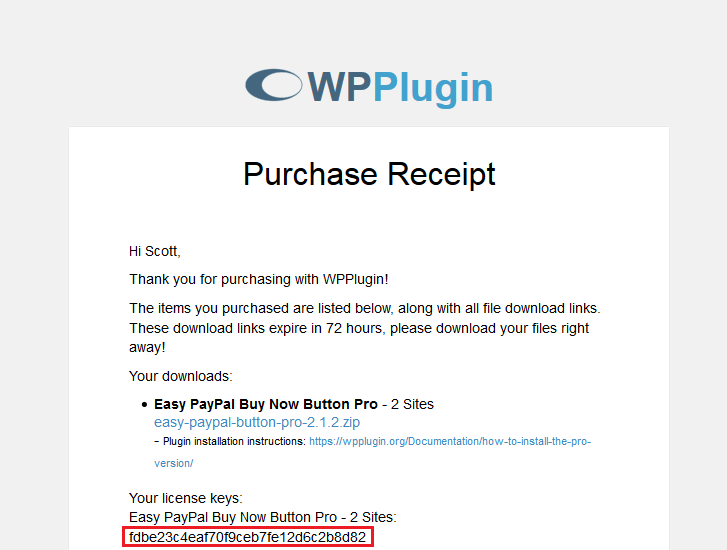
Step 14: On the email that you received, locate the license key and copy it. This can usually be done holding down the left mouse button and dragging it over the text to select it, letting go, then right clicking on it and choosing copy.
Step 15: Enter the license key into the text box. This can usually be done by right clicking and choosing paste.
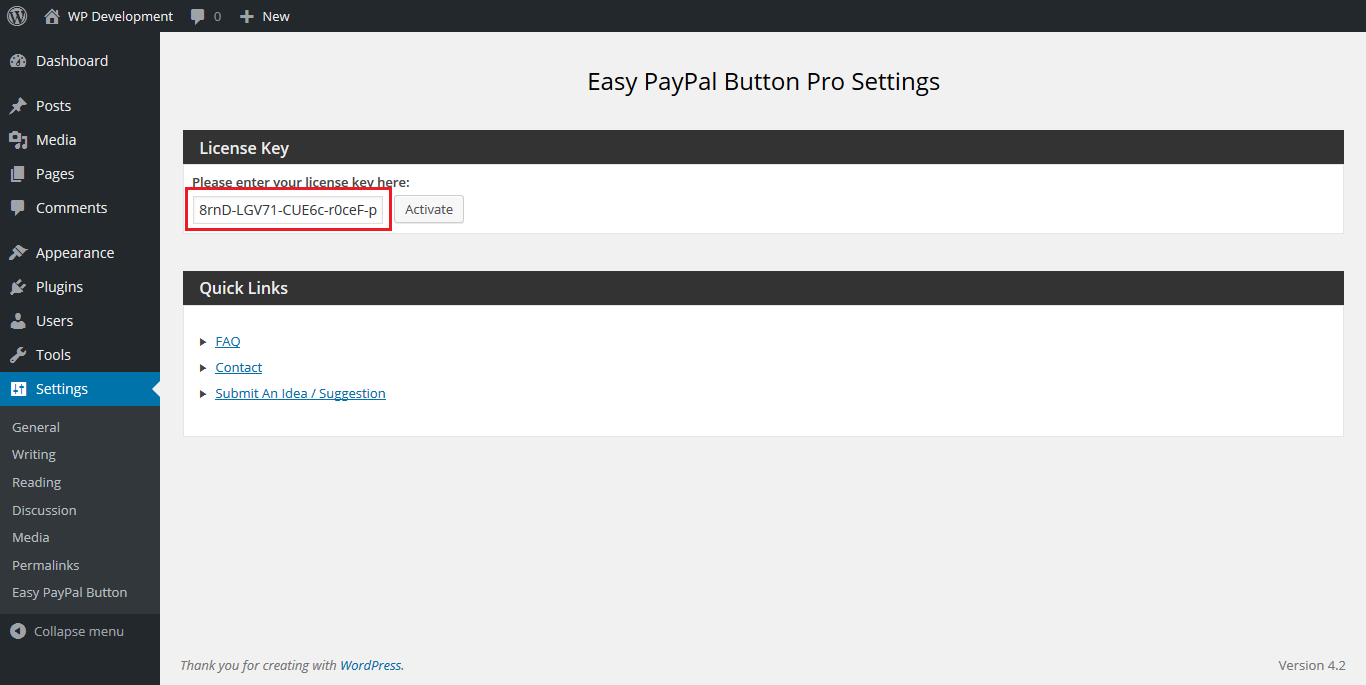
Step 16: Make sure there are no spaces before or after the key. Then press the activate button. You are now ready to use the plugin.